


Well it’s that time of year. The weather is not at its most cooperative in terms of lovely outdoor photography. So I have a little spare time on my hands and have been working hard on some projects around here and thought I might share a few of my favorites (ok, just the ones that turned out like I wanted).
First up is our new growth chart. Since we have lived in this house (7+ years) I have been marking the children’s heights in pencil, on masking tape, (didn’t want to do any permanent damage) in the pantry since I didn’t have/hadn’t seen a growth chart that I really liked. Well recently lots of these giant rulers have been popping up on Etsy and Pinterest and even Facebook and I love them. Totally inspired. Lucky for me I am married to a pretty handy guy which meant that we happened to have almost everything I needed in the garage already and my project came in at about $12…woohoo! (Purchased a new dremel bit, $7, and a number stencil, $5)
Here’s my final product:
(all photos taken with my phone)
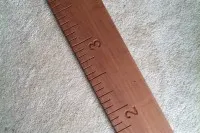

And here it is hanging on the wall with ALL their little heights from the past 14 years marked on it:

Clearly none of them are allowed to get any taller than 6′ 6″.
And here’s a little peak at the process:

A few more details of how it happened:
- Found lovely piece of reclaimed mahogany in the shop. John cut it to size and planed it to remove the previous finish and to make it nice and smooth.
- Purchased alphabet and number stencil at Michaels.
- Taped the tape measure onto the wood and carefully marked and traced all the lines and numbers.
- Purchased new dremel bit (left that up to John as he knows all the right things to get).
- Practiced a ton on a piece of scrap wood since I had never used a dremel before and it was a little tricky to get the hang of it.
- Sat on the hard, cold garage floor and started dremeling.
- Got major hand cramp and stiff back. (poor old lady)
- Moved ruler so it was supported by a ladder on each end (a la saw horse) at the right height for my poor old back.
- Finished first round.
- Went back and cleaned up a few spots.
- Tried black paint in the numbers, didn’t like it, sanded it out.
- Hand painted 3 layers of stain (found in the garage) so that the lines and numbers are only slightly darker than the base.
- Transferred the existing marks from the pantry wall onto the ruler.
- Realized that being a pack rat has its advantages when I found all the papers from each pediatrician appointment (EVER) and could put those heights and dates on too!
- John hung it in the kitchen!
Next step: current height marks!
More projects to come soon!







It is a fabulous addition to the kitchen decor.